
To test this new machine, I used a “trivase” model which is fairly good for finding faults in sidewall consistency and Z wobble problems. Because my first test model didn’t stick very well to the build plate, I used a thin coating of 3D Systems Cube(tm) Magic glue – this stuff is nearly clear and is not PVA like Elmers but still is water soluble.  After hairspray and Kapton tape, this is my favorite bed stick materal.
 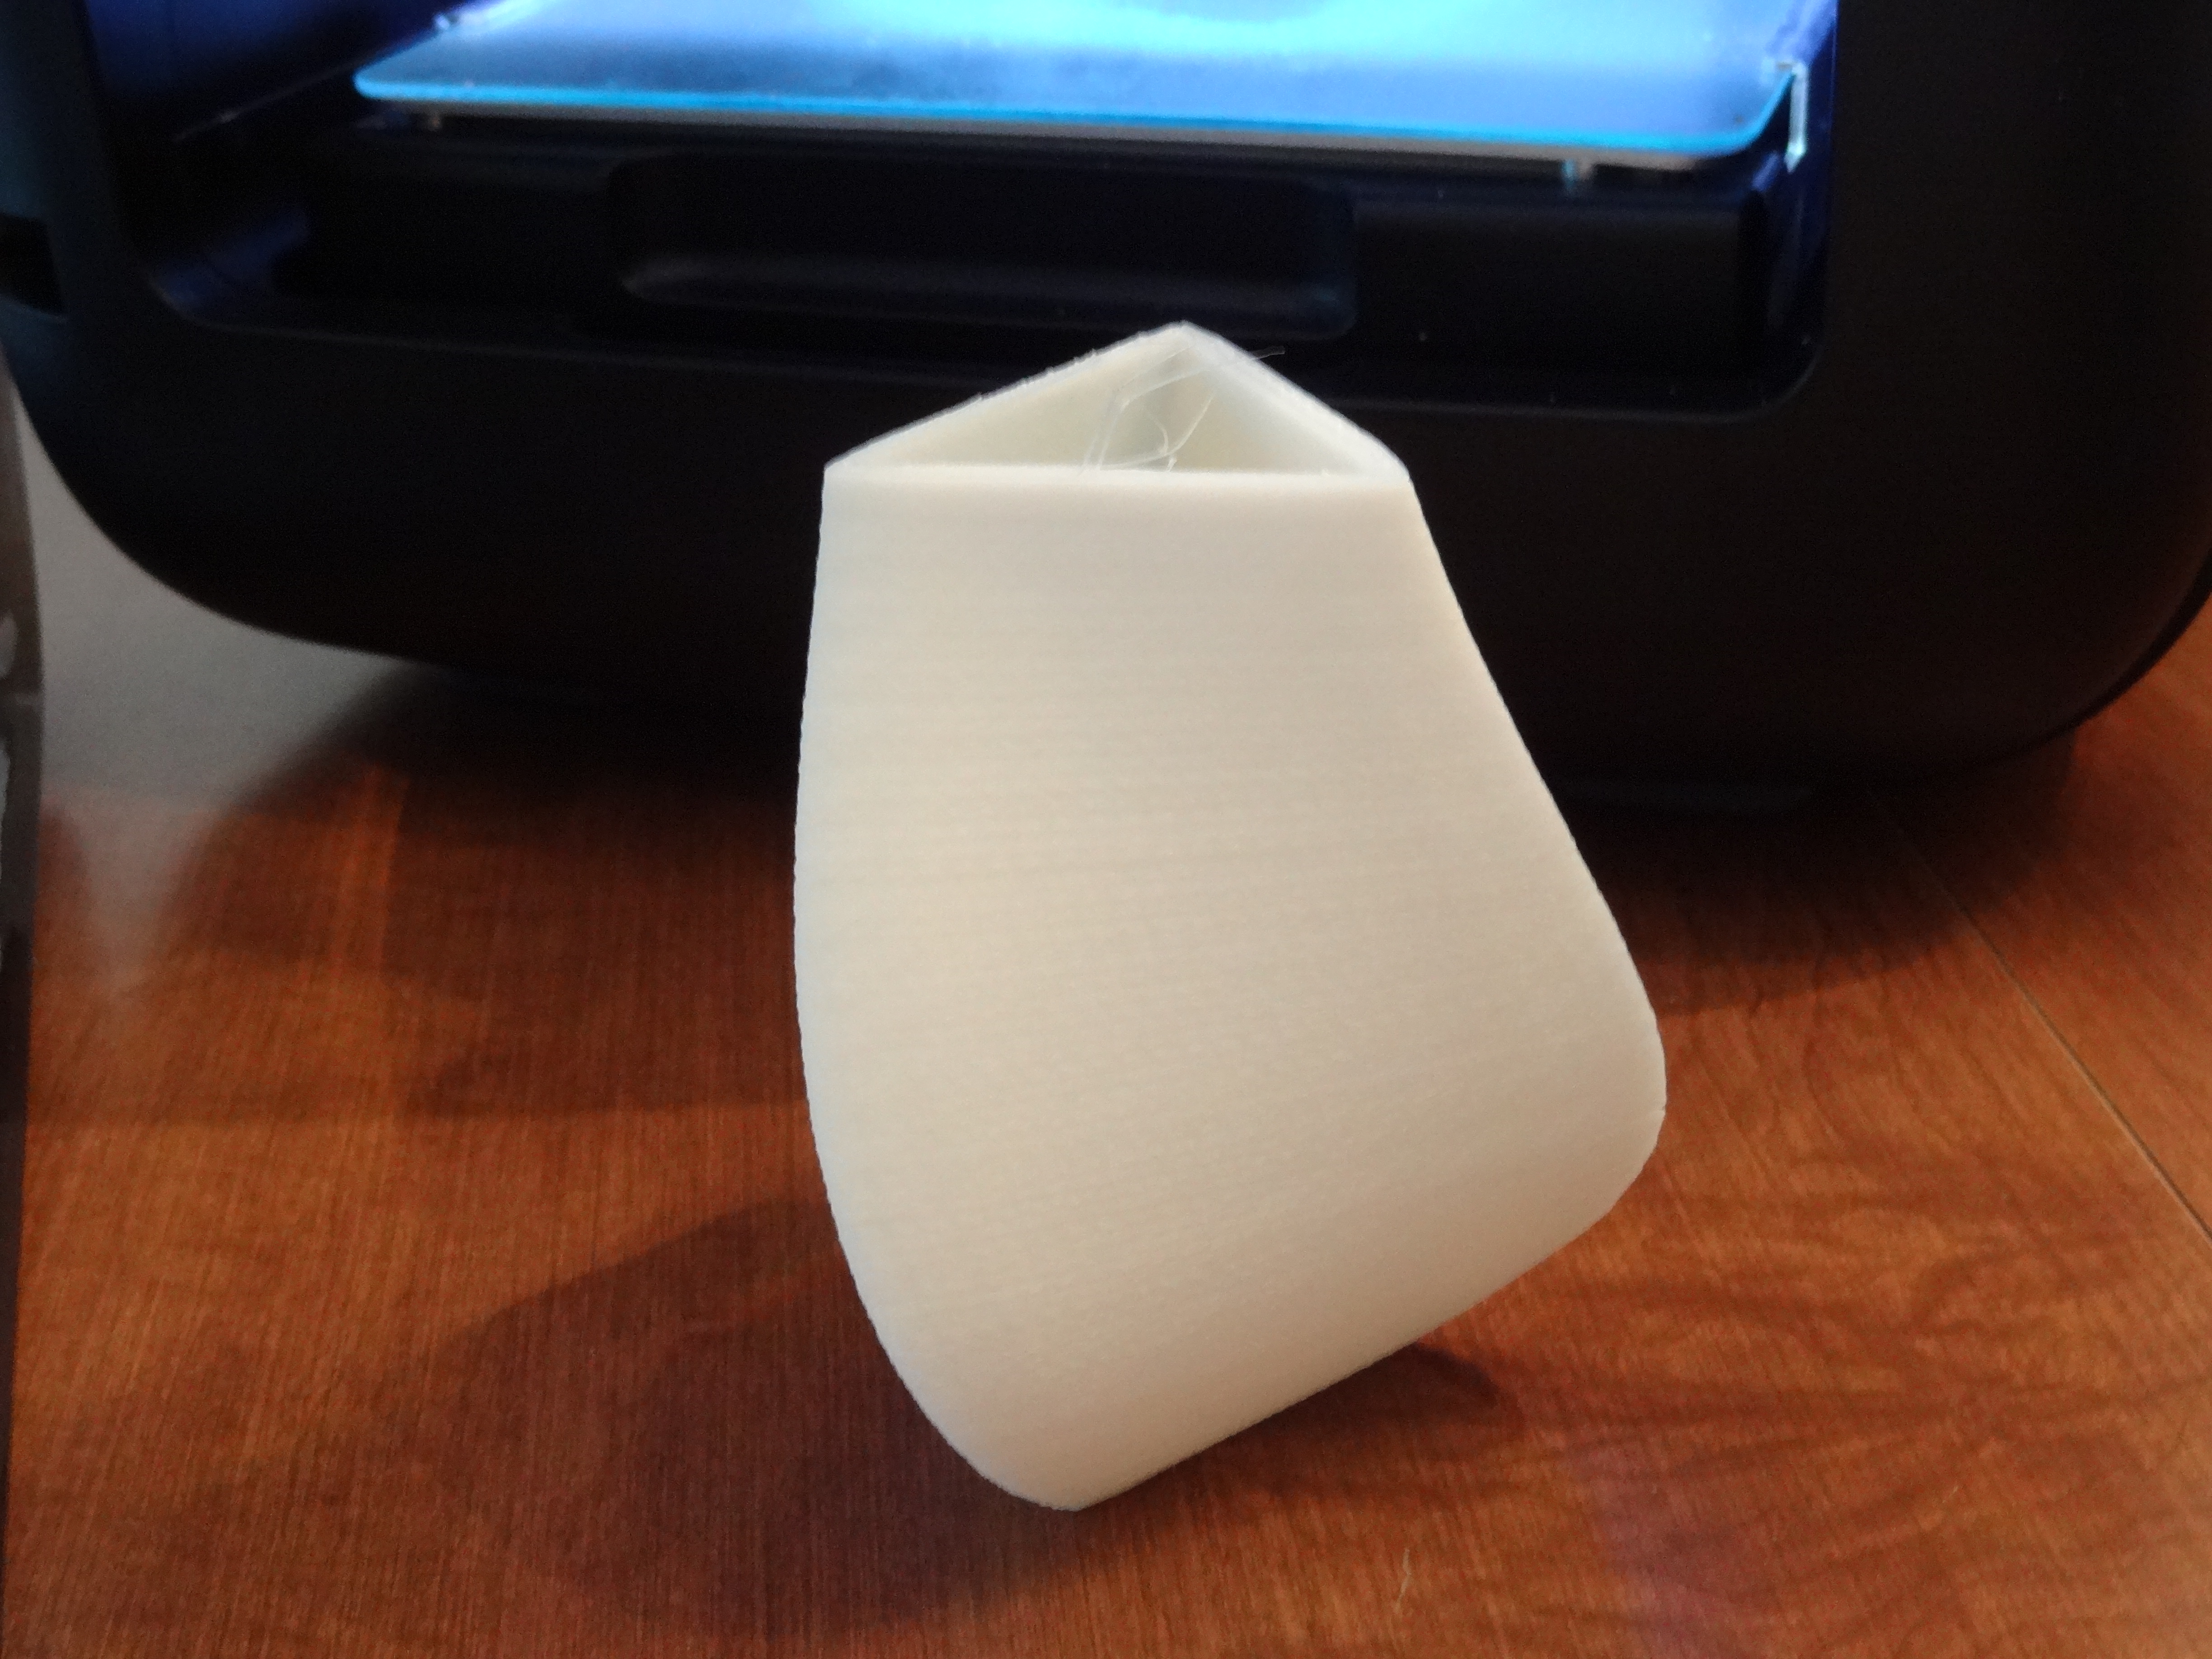 I let the machine run overnight. Next morning, though the job was “done,” this is what I saw in the machine – a partially completed vase. What happened? Turns out, I had a filament tangle in the spool.
 This is that tangle… and the filament had snapped inside the machine, running out as it kept trying to build – an airprint of sorts.
I detangled this mess, reloaded the filament and then tried to start another job. But something was not right. The extruder would work at the front of the machine, but not the back? Bed leveling issue??? I thought the Z probe autolevel was supposed to fix this (more on that later). However, as I went to check the Z height offset things were not working like it had originally. The extruder motor was making weird noises. No, this was not a filament jam! While you can’t see it, what happened was the wiring in the extruder motor connector had been compromised by the stress at that connector and the movement of the umbilical cord. There is no strain relief here. Look closely at the distance between the nylon wire wrap and the motor connector – that is how it is built.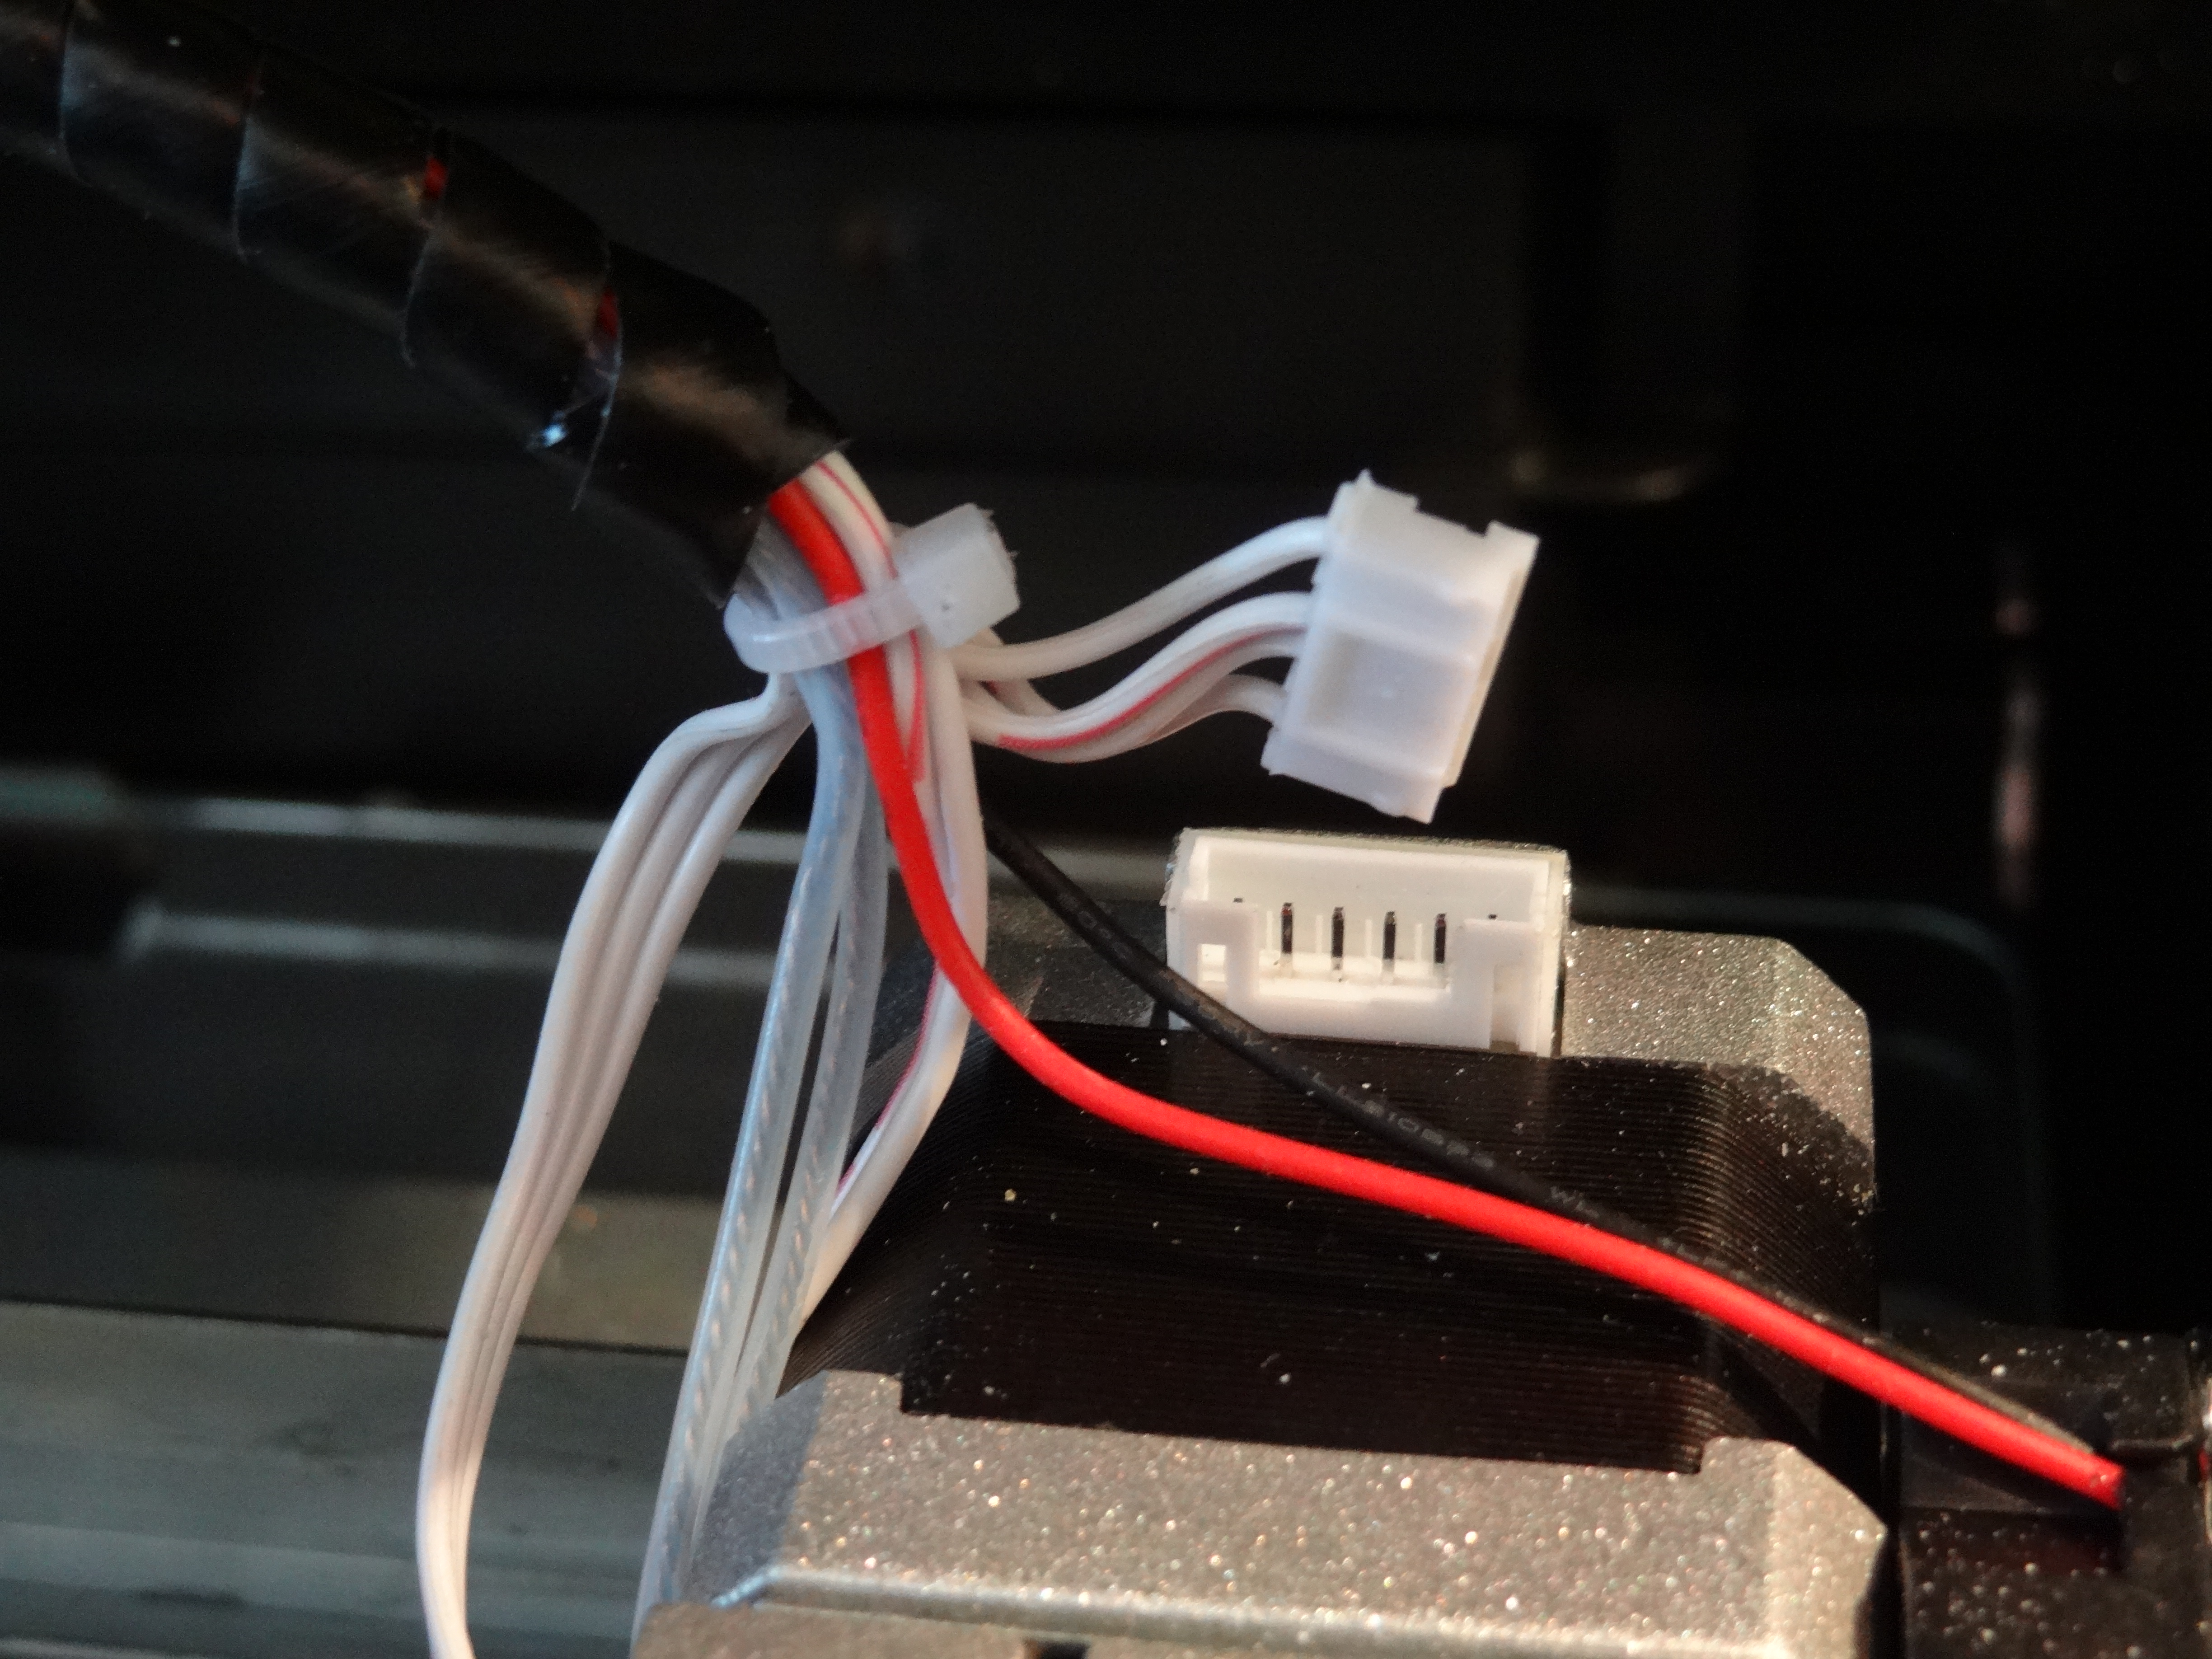 So as the head moves, the wires are getting bent and stressed, and the result is a broken connection. I could actually see a tiny spark in the end of the motor connector on the left-most wire where it is attached to the crimped terminal. While you can see I’ve changed out the larger plastic cable cover with flexible spiral wrap, the issue will come no matter what you do here – the attachment point and movement of the head will break these wires sooner or later. My 12 hour overnight run definitely found this weakness. I’m going to reattach the connector and figure out some added strain relief bracket to keep the umbilical cord from tugging on that part.
One last thing – the XY gantry has NO metal bearings. Just plastic on the metal rods – plenty of grease – but this design was not meant for the long term. Maybe OK at $349 but at $599 there are better built machines. I will say the extruder is a huge step forward – easy to clean for one. The shroud comes off, and another thumbscrew removes the half-plate on the left – the result is this: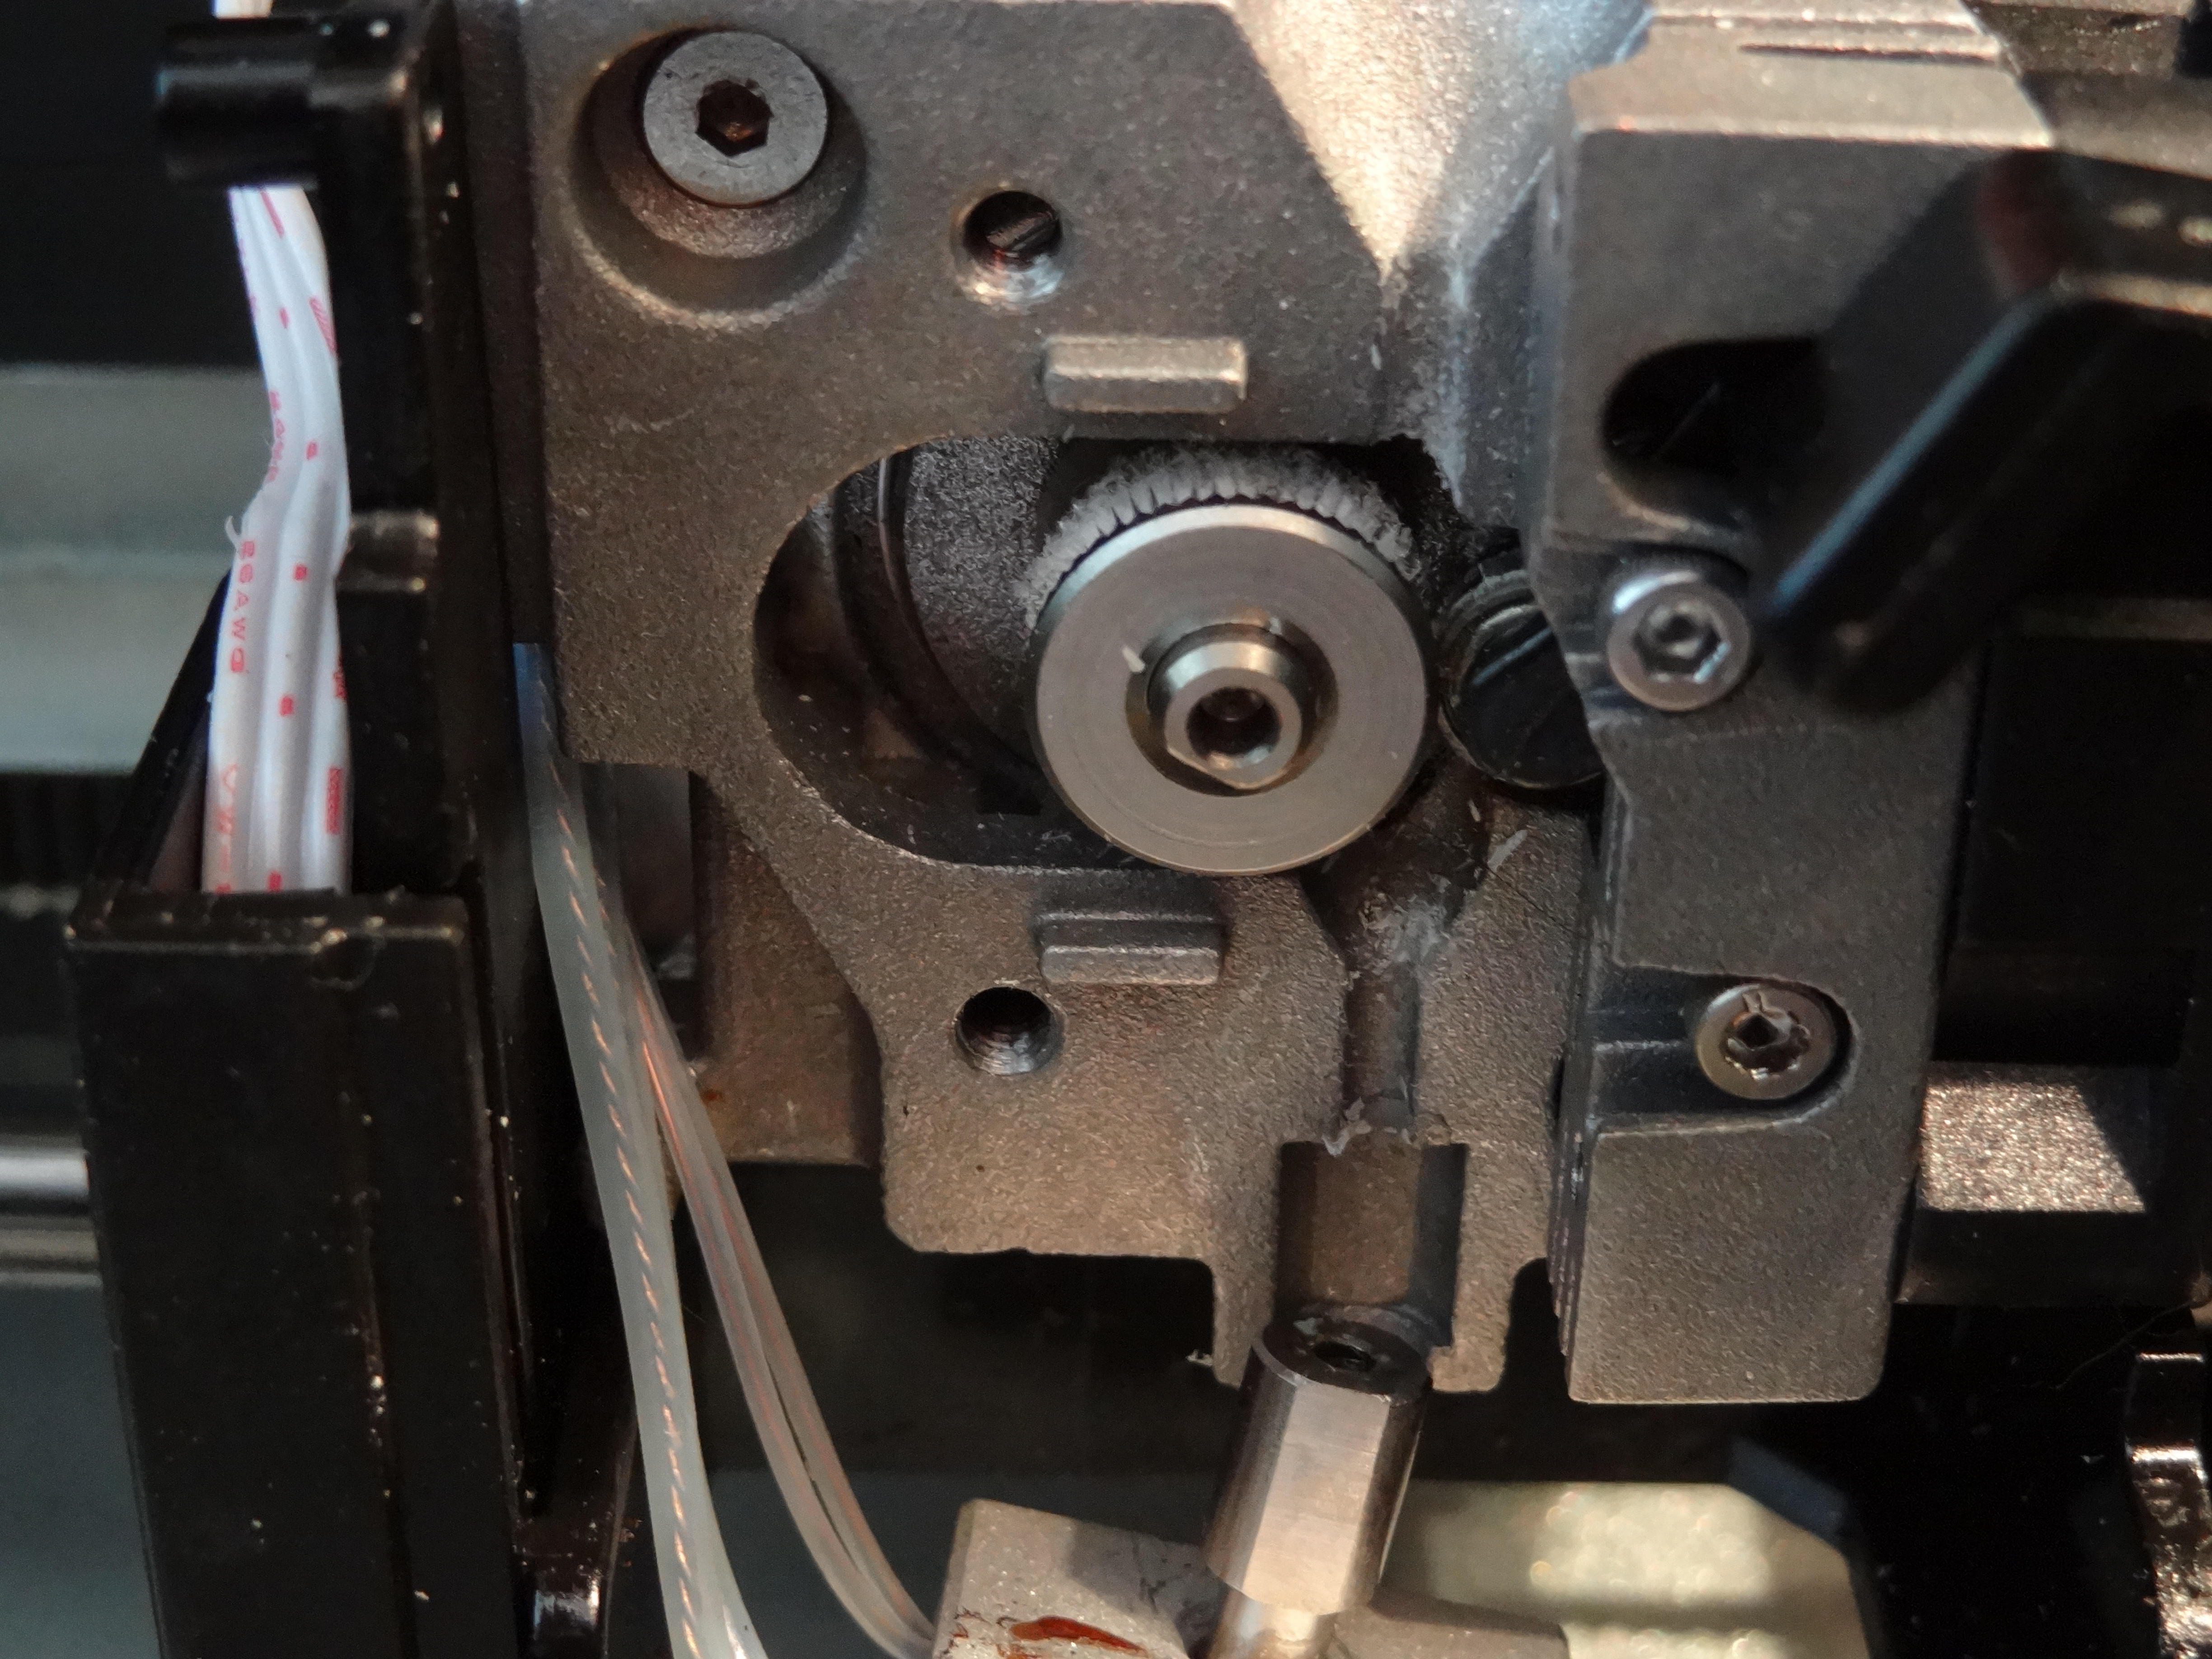 You can access the drive wheel and the lower part easily, and the extruder falls free of the drive block. Do be careful! I did this while it was hot to insure that I could get rid of any melted plastic along the way. This design is remarkably clean and should perform well. It also appears that this extruder will work with the TEM materials like Ninjaflex(tm) but that remains a test for another day. And one other positive thing – the Z axis screw appears to be an Acme thread instead of the classic threaded rod approach, but I need to do some digging into the machine to confirm that. Thanks to the Z probe report, I do know that my bed is more than 2mm lower in the front than the back – I plan to investigate that too. More to come as I work with this machine.
UPDATE: Some have asked if this machine has a cabinet filter and fan, and its amazing – it does! It appears to have a carbon activated filter mesh, but I’ll need to dig deeper into the box. I have it almost completely disassembled at this point, figuring I might as well do a thorough internal inspection while looking for useful enhancements. One is the insulation on the heat bed pad underneath; in checking it I found it already was coming loose from the corners. It is just glued on – so first I’m going to fix it with some Kapton tape at the edges. I also recentered it – the original installation was obviously hasty.
UPDATE 2: The machine is now fully repaired and ready to go. I added the heated bed insulation underside, repaired the motor connector wiring, added some strain relief and reworked the layout of the umbilical cord to the head. One additional idea I had was to put a pad of ceramic wool insulation between the top of the head block and the extruder – keeping some radiated heat from getting to the upper section. As I’ve only used the factory supplied ABS for now, I need to try some other filament and see how it goes. As soon as I get more results I’ll post them here.

Do you have a fix for the extruder wire issue? A couple people on the Solidoodle Forums are having the same issue – and if you have a solution that is known to work it would be greatly appreciated!
Yes, I’ll post it in the next day or so. I’m testing a fairly simple solution and so far it seems to be good. Thanks for asking!
I just had a print fail because the the same issue. I didn’t see an update… did I miss it?
I’m interested in the 2 mm drop of the bed, back to front. I have that, too, and I think it negatively impacts prints. There seems to be some stiction in the sliding on the Z-axis ways and it makes for some up and down hopping around of the bed due to the resulting vibration harmonics. “Auto-leveling” or not, I think one should attempt to true up the bed perpendicular to the ways so the “auto-leveling” is kept to a minimum. If you have tips on how to do this I sure would like to hear them. Thanks.
I have pondered ways to improve this. Yes, mine is also at least that much out of level. There also is a lot of play when I gently try to set it more level. When I carefully watch the Z axis during a build I can definitely see it moving to compensate from the autolevel measurements. Getting to the back of the Z axis and where the bed attaches to it is a bit of a challenge – but there are screws there which might allow some movement and adjustment. I’ve thought of actually shimming the front of the glass plate too. Much of the rigidity of the unit comes from the panels – and I noticed during an incomplete teardown that I could alter the level by pushing the chassis and shifting the fit – but this doesn’t hold when you reassemble it.
With the time that has passed, I am hoping that maybe Solidoodle has come across others with this, too, and has come up with a suggested procedure. I wrote to them this evening with the essence of my earlier note here. We’ll see if they have something of a guide. Otherwise, I guess, I will need to dig into things like you have and look for reasonable ways to shore things up.