• About Renaissance Engineer

Renaissance Engineer

~ Additive Manufacturing and Technology

Renaissance Engineer

Category Archives: Building the Sumpod

Sumpod LCD temperature display fix

14 Wednesday Dec 2011

Posted by Eric Albert in Building the Sumpod

≈ 5 Comments

If you’ve built the electronics and fired up the hot end, you may have noticed that the temperature display gets “weird” after going above 100C and returning to room temperature.  The last zero of “100” gets stuck on the display because the lcd.print() routine is left justified.  Here is a simple fix.  Just go into the arduino editor for the Sumpod firmware, and find the first line commented below.  Change the code after it as follows (the red text is what is new):

// display temp

lcd.setCursor(11,1);

int valsum=analog2temp(current_raw);

if (valsum<100)

{lcd.print(” “); lcd.print(valsum);}

else {lcd.print(valsum);}

}

Recompile and upload to the arduino board and your LCD temperature display will now work correctly.

An experimental hot end for the Sumpod

14 Wednesday Dec 2011

Posted by Eric Albert in Building the Sumpod

≈ Comments Off on An experimental hot end for the Sumpod

While I know there is a new OEM hot end on the way, I went ahead and created my own experimental one.  And, it really works!  To save time, I purchased a “universal” one offered on ebay (http://www.ebay.com/itm/110781340223) and modified it to work in the Sumpod head.


Does it work?  Yes, indeed it does.  Now, on to a real build!

Sumpod Wiring Instructions – Part 1

01 Thursday Dec 2011

Posted by Eric Albert in Building the Sumpod

≈ 9 Comments

I decided to break the wiring information into two pieces.  There are too many minor loose ends I’m working on but have not had time to address. My “day job” gets intense this time of year (final exams, tests, grading, etc.) so the “spare time” is far less so.  At the end of this part, there is a pictorial diagram for wiring the LCD.  Seems to be a lot of confusion out there, so if you are having trouble on this, check out what I have posted: SumpodBuildPart4a

Sumpod – finding the LCD problem

28 Monday Nov 2011

Posted by Eric Albert in Building the Sumpod

≈ 2 Comments

Well, building things like a Sumpod can be loads of fun!  You may have noticed that the LCD was working in the last post, which it was… and the problem?  Well, I did wire it all quite correctly, but after getting nothing but a line of fully filled in blocks, I decided to go deeper.  Now understand that everything else was working fine — all 4 motors and the control for the extruder heater responded perfectly.

The problem, as it turned out, was that two of the auxilliary digital lines used for the LCD were not actually connected to the corresponding pins on the arduino board!  The RAMPS board had two lines where running continuity checks proved out that those connections were open!  The traces are on the edge of the board and the connector are short, but the copper between them was open.  I easily fixed this with some #30 wirewrap wire to directly connect the output pin to the corresponding pin going to the arduino.  If you look very closely at the picture, you will see the wires from the second and fifth pins going from the dual row header to the edge connector. I’ve built many hundreds of printed circuit boards in all sorts of projects, and this does sometimes happen to multilayer boards.

Of course, for me this was just the “luck of the draw” in as much as there is no way, short of building the board, to discover this, unless the board manufacturer did a full circuit test.  Once patched, the LCD works everytime!

Sumpod – tweaking it a bit…

24 Thursday Nov 2011

Posted by Eric Albert in Building the Sumpod

≈ 3 Comments

I’m still working on those final wiring instructions — seems I find yet another detail to mention that I feel should be helpful.  As it is Thanksgiving holiday here in the US, I’m taking a break from work and building things.

Here is a picture of the complete unit, LCD glowing, and fan running — just waiting for something to build!   However, I’m still fussing with the extruder a bit but more on that later.  I’m also working on the XML file for ReplicatorG so it will have a specific profile to interface it to the Sumpod.  Sure, Pronterface and Repsnapper are OK and I’ve used them, but it would be nice to have one common software interface for the units I work with (ThingOMatic, CupcakeCNC, classic Mendel, and now Sumpod).

It works!

21 Monday Nov 2011

Posted by Eric Albert in Building the Sumpod

≈ 2 Comments

A quick update – as of now, it works but for a problem with the LCD display… and despite checking wiring, etc., (BTW I’ve done loads of these…) it still is not working.  Even tried a different 16×2 display of my own stock.  But the good news is that I have the heater working, extruded some plastic, and all 3 axes are running smoothly!  So it should not be long before the first build, and obviously the LCD has no bearing on getting out a print.

I already am looking at added a heated bed by routing out a piece of MDF to support a MakerBot ThingOMatic unit.  I have all of the MakerBot parts ready to go.  However, another power supply will be needed to manage the heated bed current consumption.  Thus this will be something for later.

Like some others’ experiences, if the fan is running the extruder temperature doesn’t get beyond 160C but as soon as you turn it off, it quickly goes to 200C and stays there, even with plastic being extruded.  I have a “first generation” extruder design. I do have some ceramic tape insulation that I think I will try before I go to something where the fan is controlled by the RAMPS board in some fashion.

For those of you waiting for the last build instructions, please be patient!  In testing I found some issues and so as I have said before, I do not want to release a set of instructions followed by a long list of “oops” and exceptions.

Sumpod – Powered up and no smoke!

20 Sunday Nov 2011

Posted by Eric Albert in Building the Sumpod

≈ 3 Comments

Late last night I plugged everything in and pressed that power button in back… and the Sumpod came on, and better yet, no smoke!  Just have to load the firmware…but that is ready to go.

One complication in the wiring (which will be in the forthcoming documentation ) is that the LAN cable meant to wire the LCD just didn’t work.  The problem is that most LAN cables are meant for insulation displacement connectors, and not soldered.  Mine would not take up any solder, almost like trying to solder aluminum.  The stranded wire is silver in color but believe me, it will not solder!  So, being economical, I just made up a replacement wiring harness from left over stepper motor wires.  I knew those would come in handy!

Sumpod – Yeah! The wiring is done! (but not the paperwork…)

18 Friday Nov 2011

Posted by Eric Albert in Building the Sumpod

≈ 5 Comments

My Sumpod is completely wired as of this afternoon!   I took lots of pictures along the way, but I still have to finish the written documentation for all of you.  And, there is one more really important test:  power it up and see what happens!  Actually, I do not want to release a set of wiring instructions unless I know for sure that they are right.  Still flying blind (although the RAMPS 1.3 page on reprap.org would be all you need, other than the LCD) I did add a few touches of my own.

For one, I expect to change hot ends so I used a 4 pin locking Molex connector for the thermistor and heater.  That way all you have to do is unplug the Bowden tube and disconnect the Molex connector and you could substitute say a dual extruder or some other hot end (like that from makergear.com).   Also, I used Teflon insulated wire for the connections to the heater.  You can certainly use the excess stepper motor wires, but from past experience I expect the vinyl insulation to get degraded over time.  I also decided that the fan would run with the heater, or otherwise you would have to run one additional wire to it (constant power).  So, we will see how that works.  At least that way the blue fan lights are on when the heater is running.

Another change I made was to use hot melt glue to fix the wires into the channels in the walls.  My nylon wire clamps didn’t fit into the slots neatly (the slots were too narrow).  Sure, I could have cut out the MDF so that they would fit nicely flush in the slot, but the speed of the glue approach was nice. So, I just used my miniature craft gun to get into those tight spaces.

So when will the wiring instructions be done and ready for you to download?  I will try to get those out over the weekend, so long as the “blue smoke genie” doesn’t get summoned from the Sumpod!  Thanks for your patience! – Eric

Sumpod wiring instructions – coming soon!

15 Tuesday Nov 2011

Posted by Eric Albert in Building the Sumpod

≈ 1 Comment

No I haven’t gone off for a “long winter’s nap” but rather my day job has been keeping me very busy.  The wiring is going well and as before, I have lots of helpful suggestions.  I am expecting to get this posted here by Friday, November 18.  What I am aiming for is a thorough and clear wiring procedure so you will be able to get it right the first time.   Thanks for your patience! Hopefully your build of the mechanical side is going well in the mean time. – Eric

Careful with those stepper drivers!

14 Monday Nov 2011

Posted by Eric Albert in Building the Sumpod

≈ 1 Comment

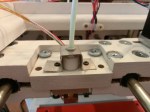
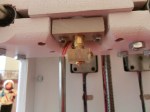
The stepper driver boards are a remarkable product of modern electronics technology.  However, I’ve seen some comments on other boards that folks may have released the “blue smoke genie” out of the bottle (or fried the driver chip, to say it more directly).A4988 Stepper Motor Driver Carrier

The particular chip in the Sumpod kit that does the stepper motor magic is an Allegro A4983.  You can see all the technical details here:

http://www.allegromicro.com/en/Products/Part_Numbers/4983/

While a robust chip for the size, it is subject to one particular issue – there is no overcurrent protection.  That small potentiometer on the driver board is a critical adjustment — too high a setting and you will likely fry that driver chip.  With too low a setting your stepper motor will either not go at all or miss steps and stall.  Shorted stepper wires will smoke it quickly!  This could even come from poor soldering of the header strips to the board. Also, removing a stepper motor connector while the power is on is another way to get that smoke genie appearing.  I’ll be explaining this all in detail and covering how to set the potentiometer in upcoming build instructions.

There is also an updated chip from the same company that makes the A4983 — it is their A4988.  This is a drop in replacement and does have overcurrent protection built in.

http://www.allegromicro.com/en/Products/Part_Numbers/4988/

Pololu Electronics has it here in the same form as you received in your Sumpod kit: http://www.pololu.com/catalog/product/1182

Perhaps Richard has already changed this in kits shipped later than mine, so you might check if you have the A4988 instead.

Thus the best way to put the smoke genie back into the bottle is to replace any burned out driver boards with the newer A4988 model.  This is not entirely foolproof — you can still get smoke from the A4988, but there is a better margin for success!


← Older posts

Help me keep going in 2020!

Donate Button

Recent Posts

  • $500 Coupon for Formlabs
  • COVID-19 and Additive Manufacturing
  • OK, one year later…
  • What will 2019 Bring?
  • Robo R2 – the big brother to the C2

Archives

  • December 2020
  • May 2020
  • January 2020
  • January 2019
  • July 2017
  • April 2017
  • January 2017
  • October 2016
  • March 2016
  • December 2015
  • October 2015
  • September 2015
  • April 2015
  • January 2015
  • December 2014
  • November 2014
  • October 2014
  • September 2014
  • June 2014
  • April 2014
  • March 2014
  • September 2013
  • June 2013
  • February 2013
  • September 2012
  • July 2012
  • June 2012
  • May 2012
  • March 2012
  • December 2011
  • November 2011

Categories

  • Adventures with a Solidoodle
  • Building the Sumpod
  • Personal 3D Printers
  • Uncategorized

Meta

  • Register
  • Log in
  • Entries feed
  • Comments feed
  • WordPress.com

Blog at WordPress.com.

Cancel

 
Loading Comments...
Comment
    ×