• About Renaissance Engineer

Renaissance Engineer

~ Additive Manufacturing and Technology

Renaissance Engineer

Category Archives: Uncategorized

Amazing new tabletop laser cutter

24 Saturday Oct 2015

Posted by Eric Albert in Uncategorized

≈ Leave a comment

CO2 laser cutters have been around for a while, but they are either very expensive or just (like low-end imports) not well designed.  A new offering that is probably the most consumer friendly device I’ve seen in this area is called the “Glowforge.”  The basic unit comes with a 40W CO2 laser, continuous autofocus, a 12″ x 20″ bed and internal object recognition cameras that work to identify the materials and alignment.

Check it out here:  glowforge laser

And if you would like a $100 coupon off the purchase check here:  $100 Coupon

This will cover the $99 shipping charge (if you are in the US) so think of it as free shipping!

Early orders go out in December 2015 but I’d guess that later orders will not be fulfilled until mid-2016 (just guessing).

UPDATE: Shipments have been delayed for at least 6 months due to an issue with the power supply – claimed to be a custom component – and that only now (4/16) have the first samples of properly spec’d parts arrived. Refunds are available if you do not want to wait…

Some upcoming reports and a coupon!

14 Monday Sep 2015

Posted by Eric Albert in Uncategorized

≈ Leave a comment

First – a shameless promotion… MakerBot is running a coupon special.  If you tap on this link $25 MakerBot Coupon you’ll get a coupon for $25 off your order on a MakerBot machine and supplies.  The details will appear in a new window… Yes, I’ll get a small commission if you use this custom coupon, but any receipts go back into paying for this blog and purchasing machines and materials to test and review.

So while I’ve been quiet for a bit, here are some upcoming reviews that you might find useful:

DaVinci Nobel 1.0 SLA

iBox Nano SLA

Little RP SLA w/tilt option

SeeMeCNC Droplit SLA

And maybe by the end of October, a Peachy Printer…

Spring update

06 Monday Apr 2015

Posted by Eric Albert in Uncategorized

≈ Leave a comment

Despite the fact that it is astronomical spring here in the northeast US, still a pile of accumulated snow remains in my front yard.  Hopefully it will not last much longer!

Since early February I’ve been focused at work on a number of extra projects and at my home shop, working on updates to current machines.  So here is a brief summary as to where things are at this stage:

1. MakerBot Mini – working really well, new firmware released recently has made it quieter and the mandatory rafts are now much easier to remove.

2. Cube 3d Generation – with both client and firmware updates and along with some tweaks in the cartridge design have now made this machine very reliable (for me anyway) and builds are working in one or two color mode.

3. Solidoodle Press – soon up for sale.  I’ll be putting it on ebay for $349 plus shipping, maybe less… contact me if you’re interested.

4. Zeepro Zim – the user interface has improved by leaps and bounds.  The machine itself is solidly built and is probably the most quiet hardware out there.  Now that cloud printing and remote control is available, it is one worth considering.  To sweeten the deal, they were having a limited sale at their site http://www.zeepro.com recently.

A new addition to my software resources is Simplify3D.  I’ll be doing a separate review soon, but wanted to mention that it does run a DaVinci 3D 1.0a machine just fine and the results are far better than the free client supplied from xyzprinting with the machine.  In fact, their client software is probably the worst one out there — you’d think a large corporation could manage to create an exemplary user interface to their equipment.  Their new Junior unit is now listed on Amazon for pre-order.

Solidoodle Press – more fixes and improvements

31 Saturday Jan 2015

Posted by Eric Albert in Uncategorized

≈ 4 Comments

I managed to print a 20mm calibration cube using some ABS filament other than what was sent with the machine.  The part came out with some interesting defects (the side walls showed definite herringbone patterns, suggesting insufficient drive to the extruder motor) however the X and Y accuracy was pretty good. But as I unloaded the filament at the end of the job, it was obvious that I too now had the “loose screw” in the drive wheel problem.

Fixing that is not difficult – take the plastic cover off and the left side of the extruder body using the two thumbscrews.  Then take the fan on the right side off and it will uncover some slits where you can easily insert a 1.5mm allen wrench.  Of course you’ll have to get the drive wheel in the correct place on the stepper motor shaft, as well as the proper front spacing.

Pictures coming soon.  Note also Solidoodle released an update (1.1.1 now) to the client software on 2/12 or so) – it fixes some issues reported so far.

UPDATE:  while I get my video properly edited, here are the things you can do to improve your head cable:

1. Remove (and discard!) the factory supplied black cable loom piece – if it is like mine, it is too stiff, too large, and too big in diameter.  It just gets in the way.

2. Use a tywrap to fix the cable bundle at the head to the top side of the extruder motor.  I also used some hot melt glue as an enhancement.  The wires should come off of the left side of the head, low and with enough give for the Z probe to move.

3. Use some tywraps to make the cable bundle secure along its length back to where the wires enter the chassis.

3. Fix an elastic string (I got some at a fabric shop) to the cable bundle about midway, and hot melt glue it there and to the front left corner of the chassis.  There will be some need for experimentation for the best “preload.”  What this does is keep the cable assembly tensioned so that it remains relatively suspended no matter where the head is positioned.

4. Finally, use 1/4″ plastic spiral wrap (I tried 1/8″ and it is too tight) to cover the entire length of the cable.

If I can only get my regular day job of late done, I’ll be able to get to this fun stuff! 😉  And a new post with video will be there soon.  This works fairly well so far but I remain convinced it is just an interim solution — something better is needed for the long term.

DSC01944 DSC01949

MakerBot Mini – First Impressions

04 Wednesday Jun 2014

Posted by Eric Albert in Uncategorized

≈ Leave a comment

Well today the Mini finally arrived.  Ordered back in late February, but given the problems of the 5th Generation Replicator, I was in no hurry.  I know I got a better engineered Smart Extruder module – one way to tell is if the module has a lot of thin fins in the cooling window (just compare to the pics on the marketing pages for the old style).

So I installed MakerBot Desktop 3.1.1 which supposedly has camera and WiFi support, along with the latest firmware for the Mini. Short answer – it doesn’t work.  Neither camera nor WiFi works for me and there is no clear explanation.  I use WPA2 personal on my router – the WiFi setup procedure seems to work (it sees several WiFi routers in the vicinity), I enter the correct password (no error message after that) but it never shows up on my client list.  And as for the camera, nothing there as well.

Auto levelling seems to work – but there appears to be a low spot on the right front of the build plate, as even the PLA raft doesn’t stick to it but warps (gosh, it takes a lot to get warped PLA on blue painters’ tape).  Something to investigate or maybe send in a support ticket.

So my first impression?  This is still a work in progress as far as the software goes, and perhaps some details of the hardware too. Sorry to say my XYZ Printing DaVinci 1.0 works better at this point and at 40% of the cost.

UPDATE:  After two firmware updates and one MakerBot Desktop update, I now have a fully functional Mini.  And WiFi and remote monitoring now work too.  Still, while I like the package, I think the overall price/performance is not great.  Why?

Rafts:  love them, hate them, you can’t turn them off.  Or at least not without hacking into the software.  Thing is, some parts just don’t need a raft – and PLA sticks well to blue painters tape.  Which, in my case, has to be two layers thick or my prints (raft included) warp off of the front of the build plate.

Layer height:  200 microns and higher (if you like), but no less.  Gosh, this makes small parts.  Smaller layer resolution would be nice.

Noise:  if you are in the same floor as the Mini in my house you know it is working.  And the second floor…

BTW the camera is practically worthless – it is more like a slow security cam feed – once every 8 seconds or so it refreshes.

I have made some quite acceptable parts despite these shortcomings.  However, the competition is at MakerBot’s heels and if they are going to survive they need to ramp up the QC (no more unwitting customer beta testing) and features/price point to make me stay with them.


Solidoodle V2 – Updates

25 Monday Feb 2013

Posted by Eric Albert in Uncategorized

≈ Leave a comment

Tags

3d printer, solidoodle

Wow, seems like an eternity since last September and I’m long overdue for an update.  First of all, there will be some new machines reviewed here in the coming months – most notably the PiMaker kit from the Kickstarter campaign, and the Qu-Bd Revolution machine.  Both are expected to arrive in March.  Look for some musings about the Cube and Cube 2 to be posted as well….

As for my Solidoodle 2, I’ve made some significant modifications.  So in no particular order, here they are:

Power Supply

I really got tired of the dangling brick power supply, so I replaced it with a 12V, 12A unit and placed it inside of the case.  The original unit was 12V, 10A.  Because I like to take machines to technical events, the original design is not good as the wires on the 12V end are just placed into a screw terminal block. So to accomplish this, I also made the next change…

DSC01084

X Endstop LocationDSC01083

In the as received design, the X endstop is a switch mounted on the right end of the X axis.   The wires for this are routed through the chassis and back under the Z axis.  This was in the way for the location of the new power supply.  So, I removed the switch, installed a smaller microswitch underneath the extruder mount, and added a fixed endstop plug where the original microswitch was mounted.  The wiring for the new location now is in the same bundle that goes to the extruder.  The pictures show it well, so I’ve included those here for you to see.  The result is that now all of the wires that come from the lower left chassis grommet (looking from the front) now stay on the left side of the chassis!  The wood stop was made from some scrap MDF board. I’ve left the MDF unpainted in these photos — much easier to see, but I later painted it black to match the plastic.DSC01082

Electronics Cover and Fans

Again for reasons of making transportation easier
(as well as keeping the electronics cool) I think this should be a standard part of the unit but then at the $499 price it is probably not possible.  The design is straight from Thingiverse thing noted here by lawsy: http://www.thingiverse.com/thing:31325

About the only thing left to do at this time is to attach some acrylic covers to the sides and a door to the front.  I did not order the door/cover combo.  I am gluing magnets to the acrylic sheets that are thick enough to also be spacers so that there is a small amount of venting of the inside.  As for the door, two common hinges and a knob with the acrylic sheet will do nicely.  This will keep prying fingers out of the box, but the top will still be open.

Printrbot LC+ First Impressions

06 Friday Jul 2012

Posted by Eric Albert in Uncategorized

≈ Leave a comment

With the summer heat here in the East, staying inside in air conditioning was a more comfortable option.  And, with the arrival of my Printrbot LC+ last week, building this long awaited kit was the perfect indoor activity.

So how did it go?  Well, total build time so far 5 hours (to what you see in the pictures).  It is not yet ready to fire up but close.  The heated build platform is off at the glass cutter for a custom fit — more on that later. For now, let me reflect on the good, the not so good, and some (yes) bad.
The Good
The kit had all of the parts as listed on the manifest, including some extras here and there. The laser cut plywood is stiff and nicely done.  I had no fit issues per se with the plywood pieces.  The electronics are well executed and the board is clean and has a nice layout.  I bought an extra one earlier for use on another reprap project.  You get a pound of black 3mm ABS filament to get started and an extra brass nozzle.  It even comes with the USB cable.  Linear bearings and smooth rod are nice but the use of threaded rod for the z-screw is a throwback to the old reprap days. By now Acme screw rod should be the norm here.

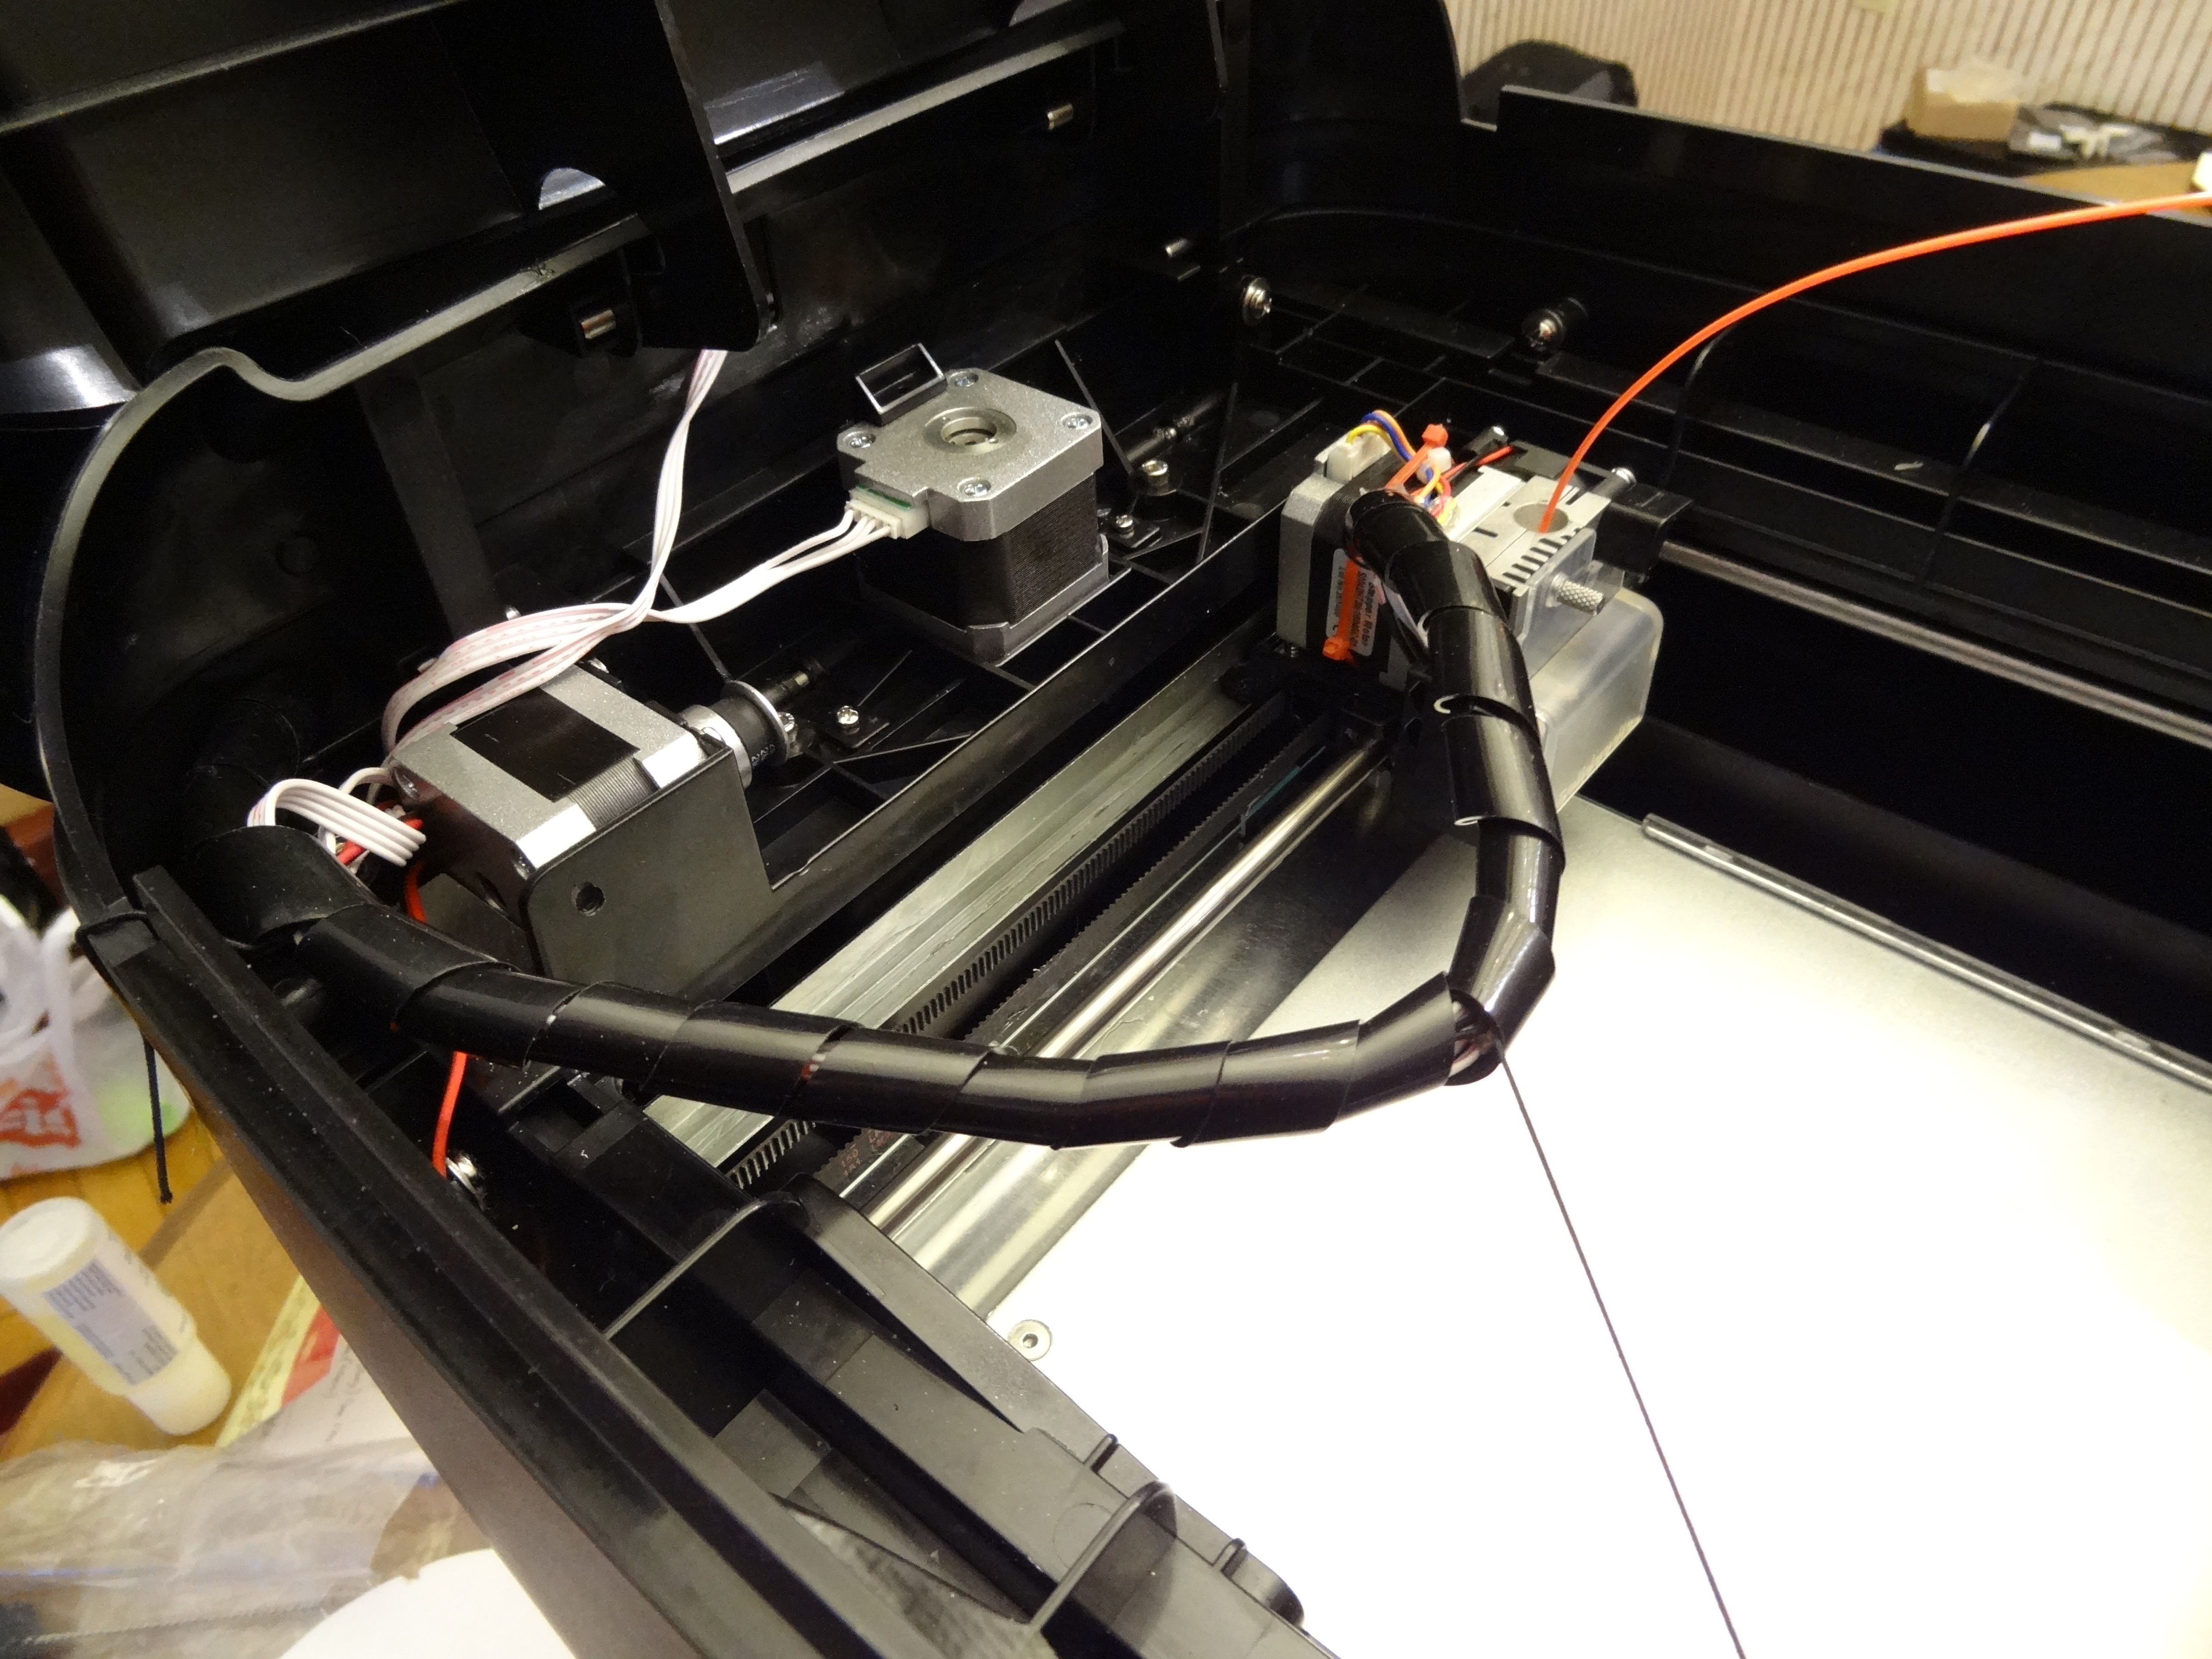
The motors and other electrical parts come with pre-wired connectors so that part is plug and play.  However, no cable management materials come with the kit, so I used my own spiral wrap to dress the runs.

Not So Good

Documentation for the build needs a lot of help.  For the LC+ what you basically have is a 2D layout of the laser cut wood parts that are more or less in spatial relation, but no 3D views of any assembly other than the extruder, which is common for all the models.  What you do get are (IMHO) tedious assembly videos that are specific to the LC+ without any printed documentation and mostly one (above view) camera angle. Mr. Drumm sometimes contradicts himself or gets chatty with really unnecessary explanations. There are times when I just gave up watching and fast forwarded to some frame with a sufficient view that helped to show the result.  The folks at the H-1 project (www.seemecnc.com) have an incredible step-by-step build book that Mr. Drumm should emulate for future sales from his store.  Could my kid build this?  Yes, he’s an aerospace engineer.  Could your 12 year old build this?  Probably not without some serious help.  While I understand the response from the Kickstarter campaign was over the top, one of the first persons I’d get under some contract for help would be a CAD draftsperson to craft detailed documentation.

The z-axis uses two motors – one to drive each threaded rod.  I’m wondering just how well this will work, because if one motor skips due to friction, the tilt of the x-axis will be affected.  As it is now, it appears that there is some warping from side to side, so that may be something to address when I try to run it.

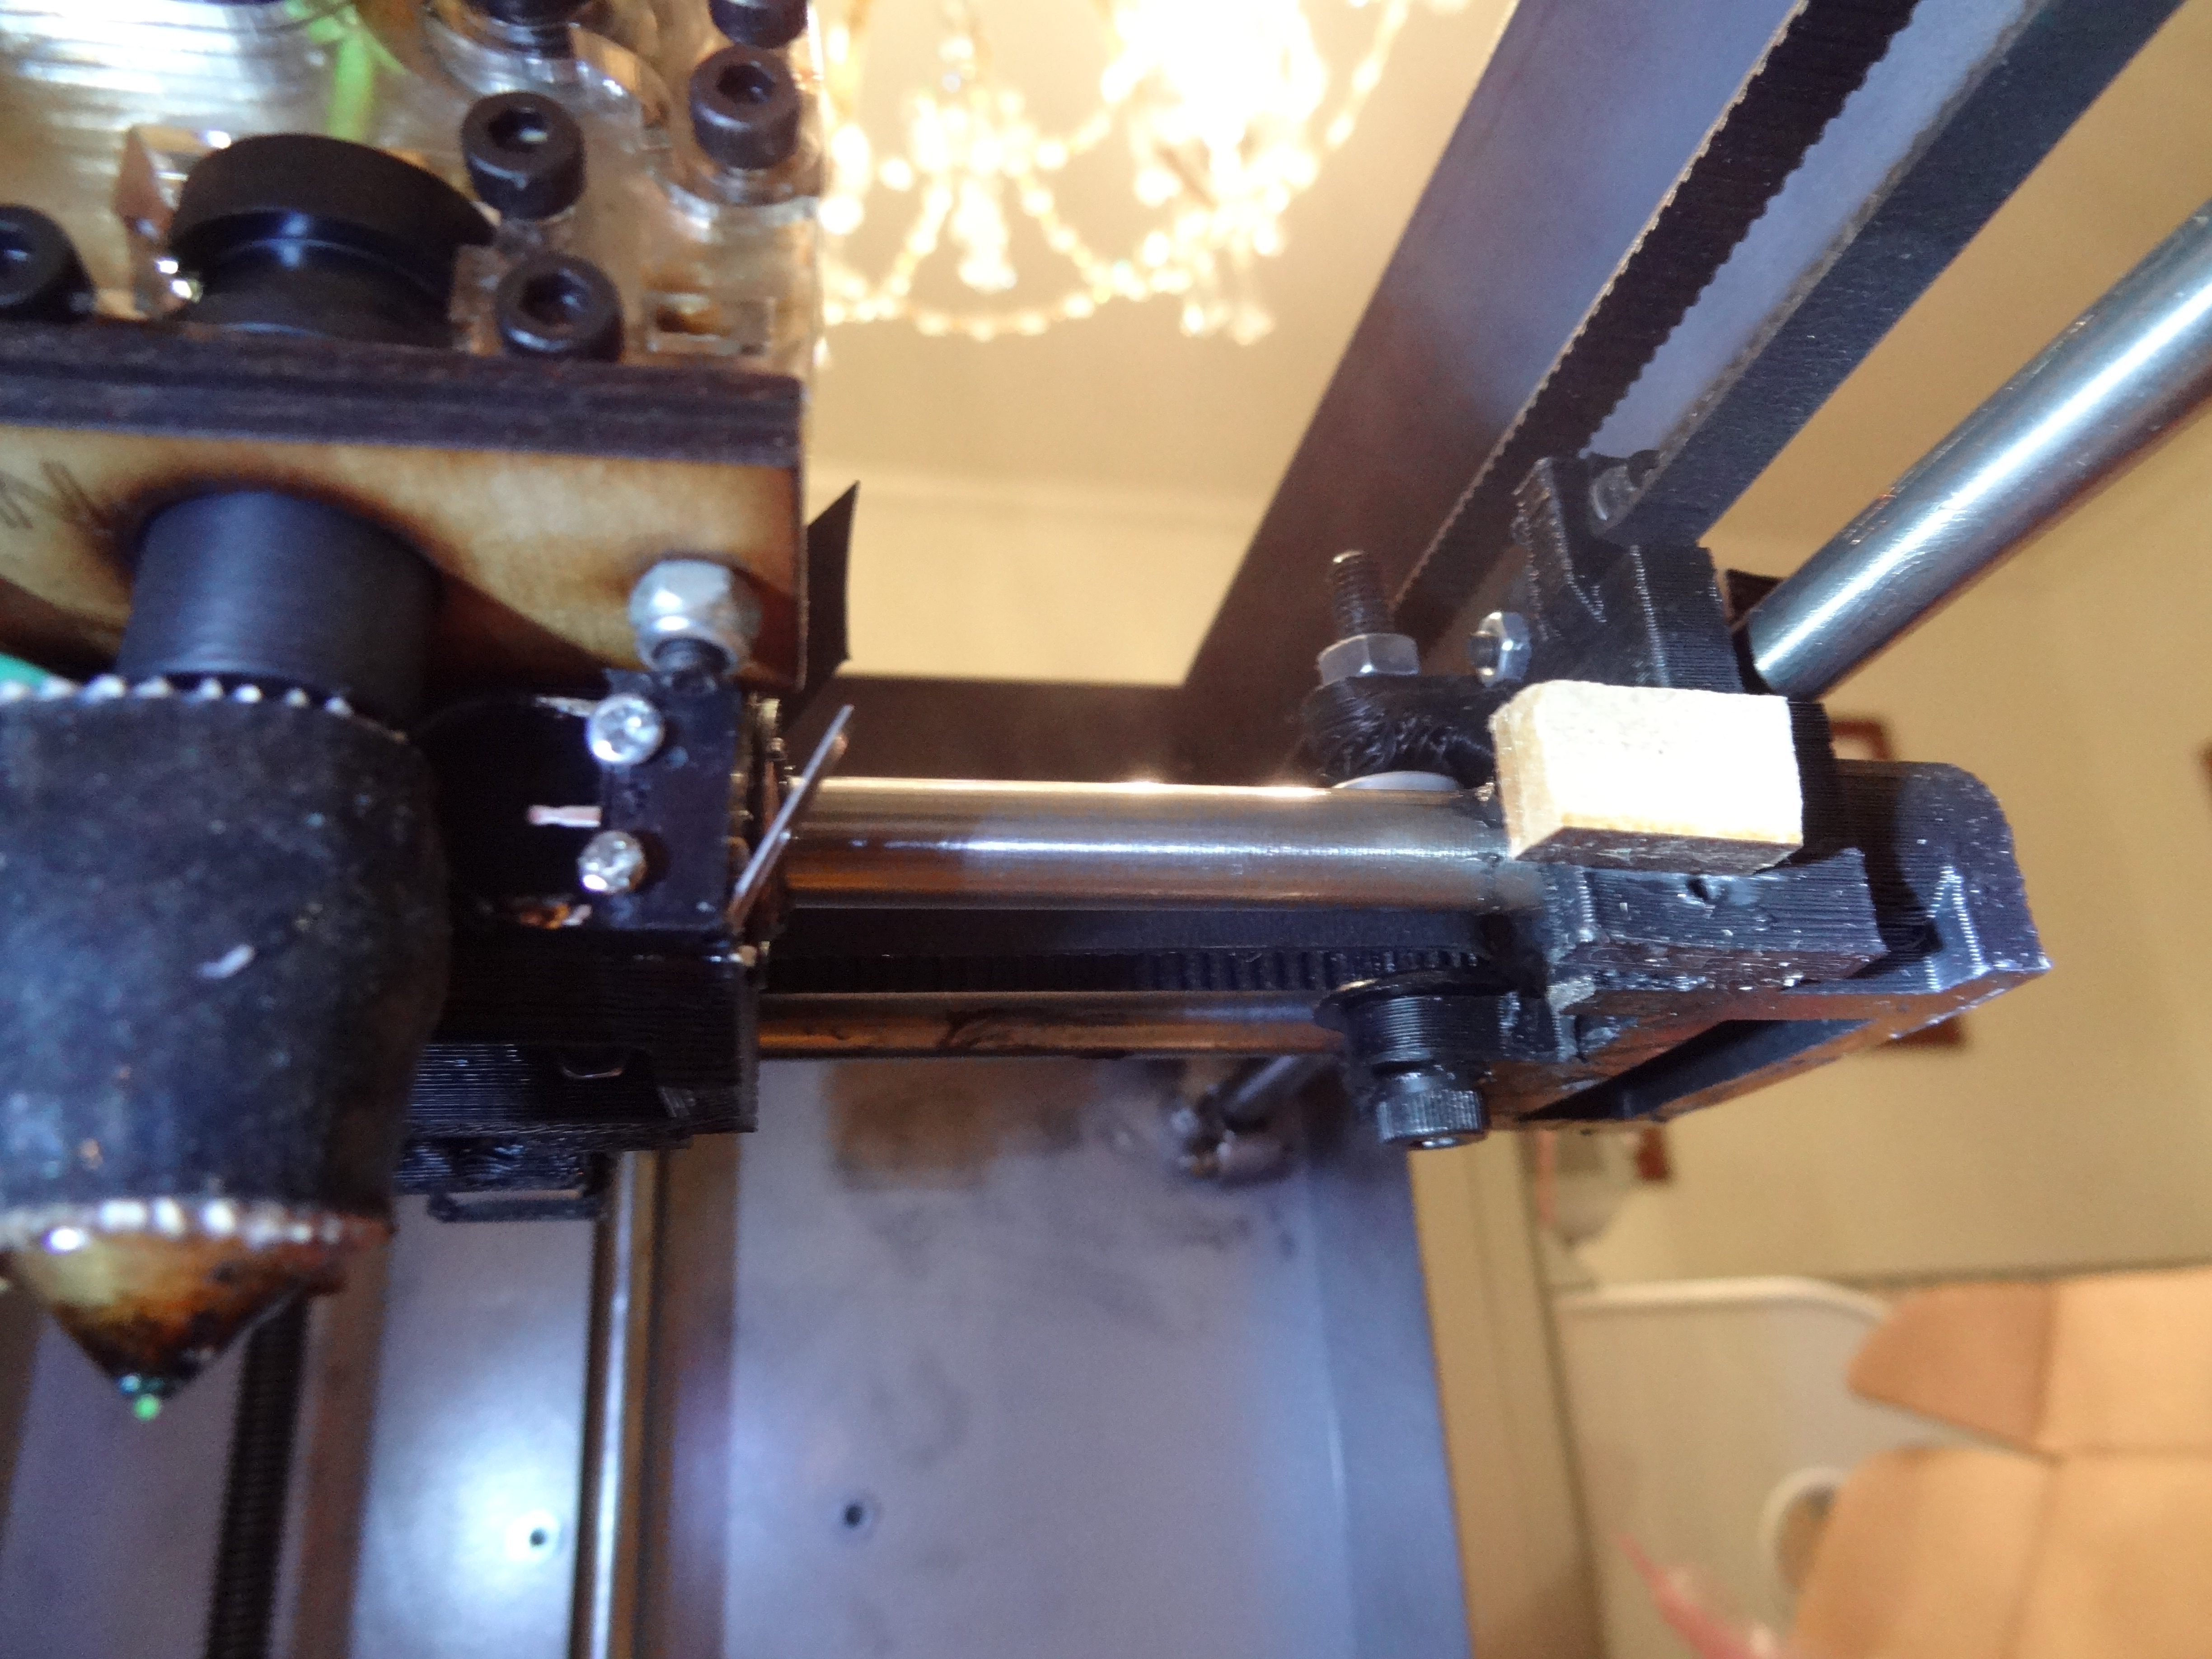
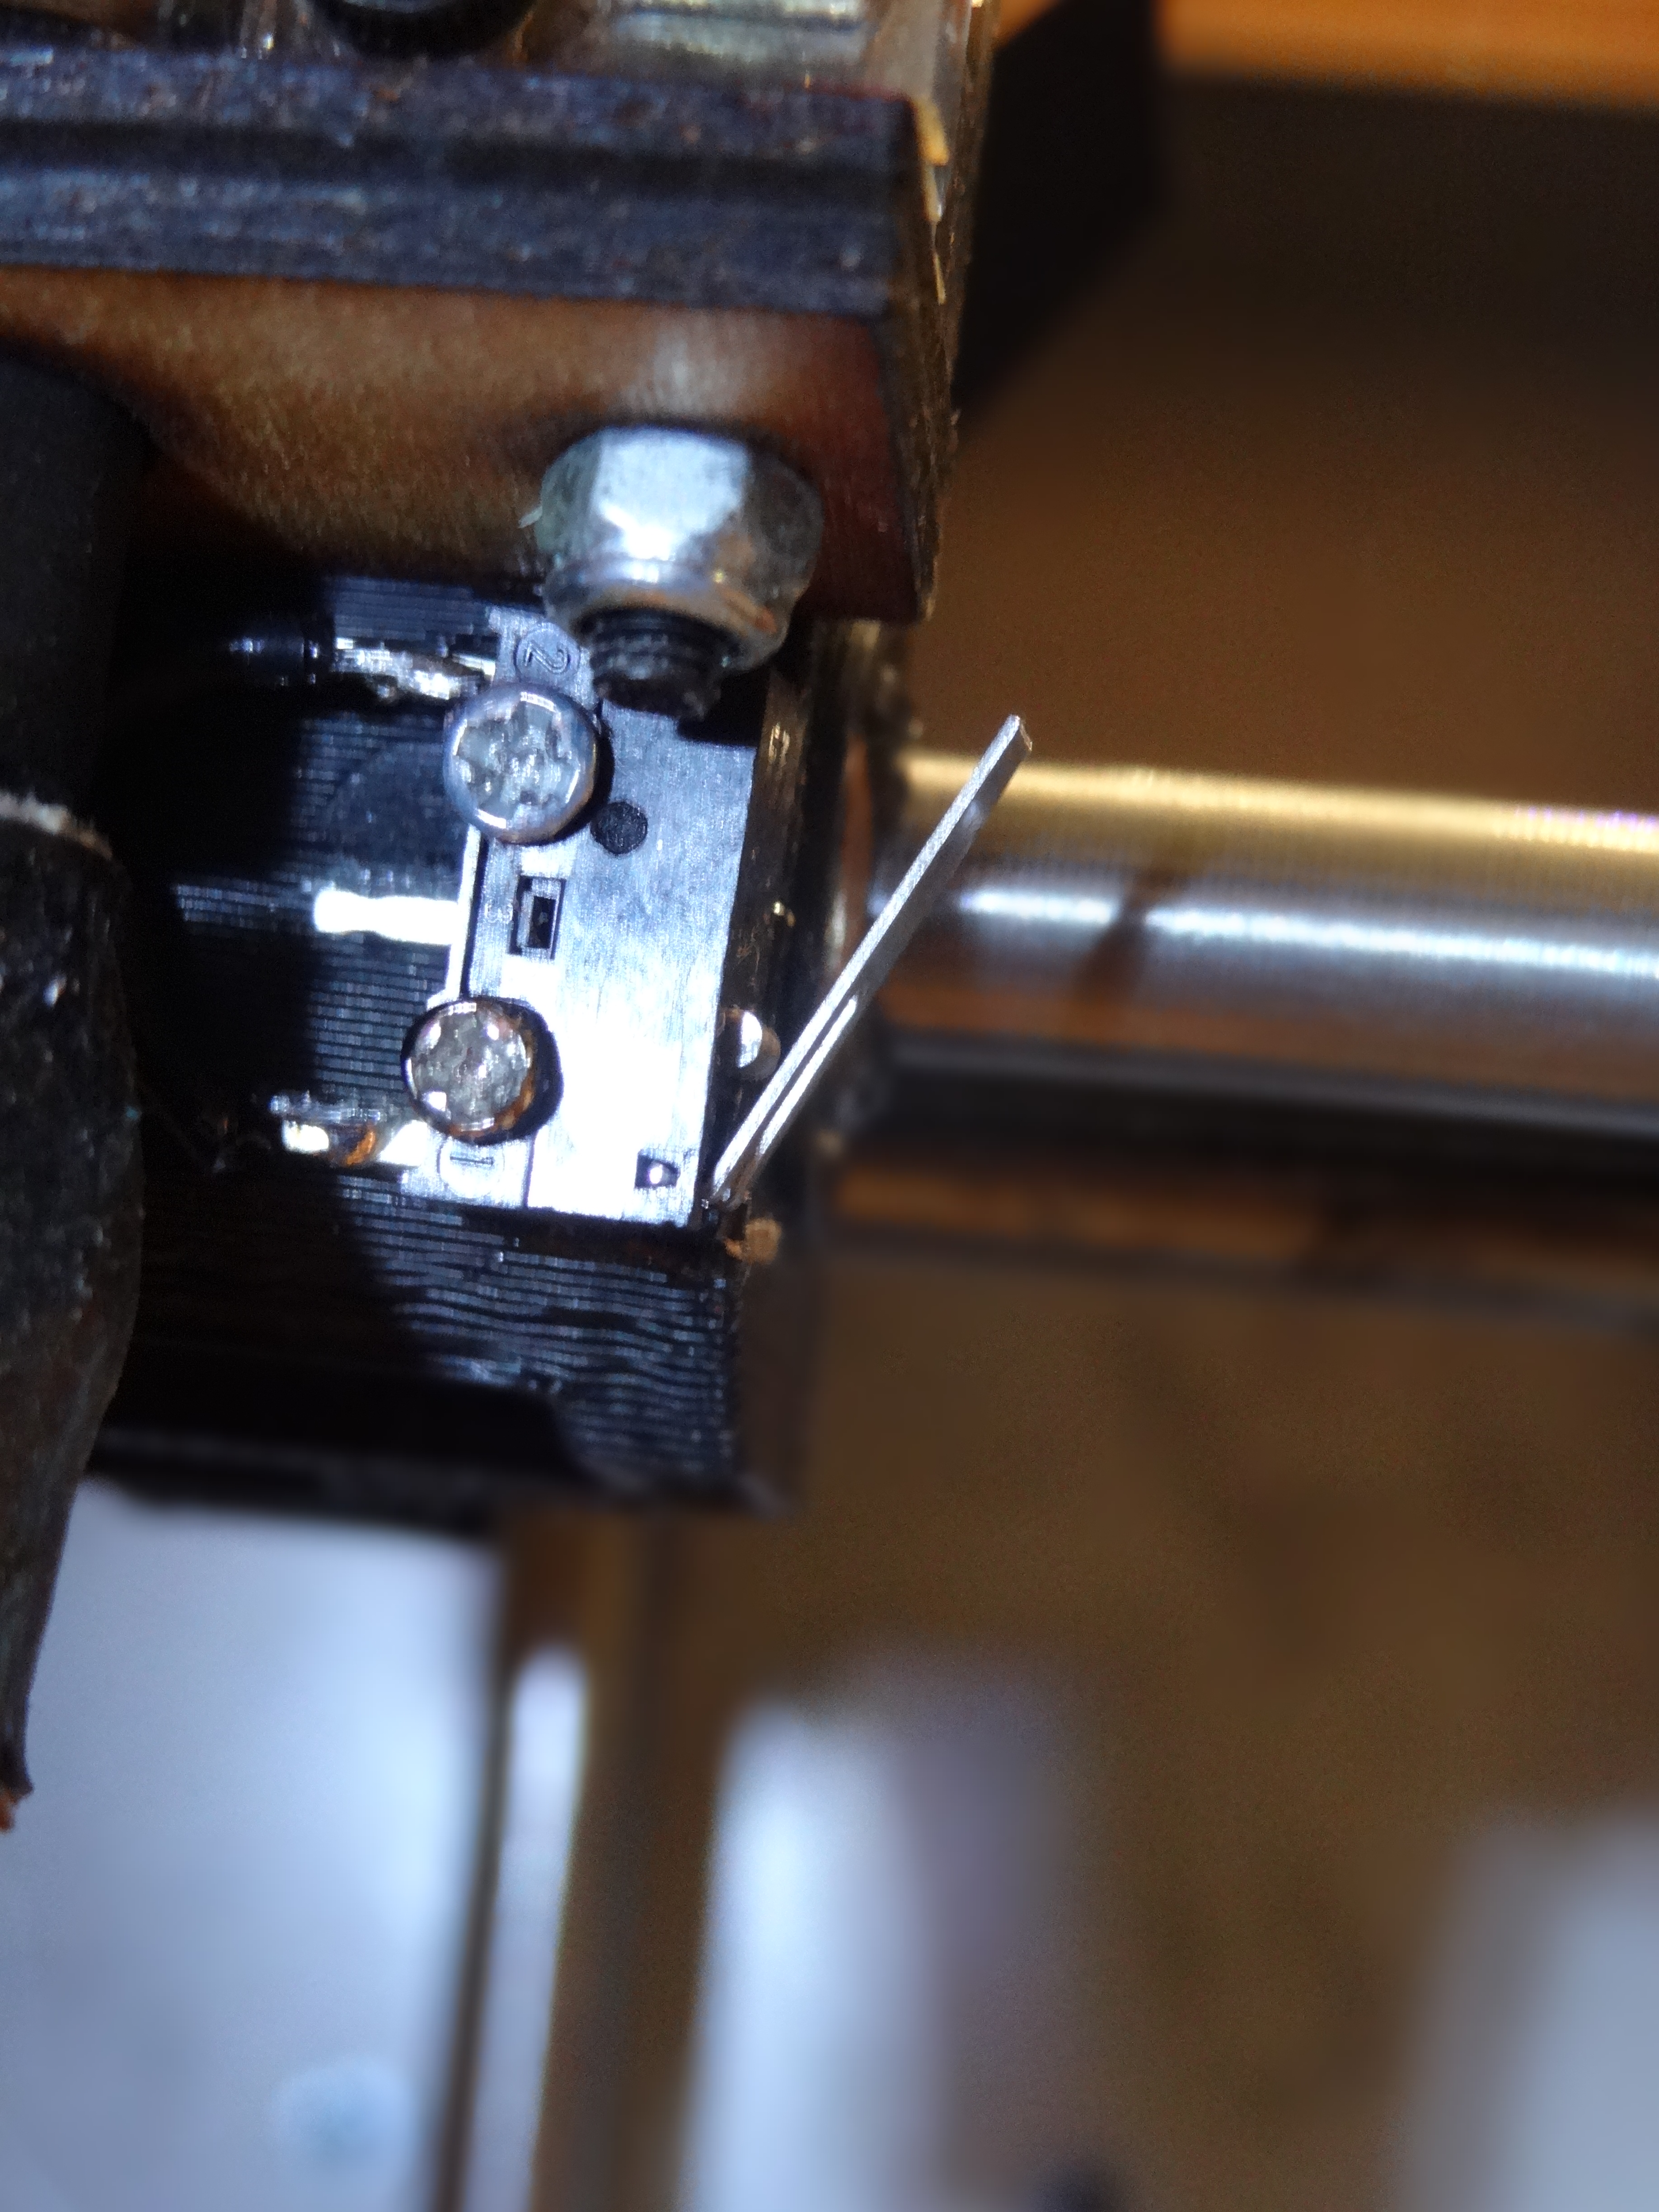
To insure positive engagement of the x-axis endstop, I turned the screw around so that the head was facing the switch.  Not sure this is in the video or not, but if you use the threaded end the alignment is off enough that it misses the edge of the switch lever.  Since this should be a once and done adjustment, I don’t see this as a big deal.

The Bad

Yes, there is some bad to share.  Most of the printed plastic parts left a lot to be desired. The biggest problem was they were so undersized they couldn’t be used.   The other problem was that on the down-facing surface, there was a noticeable flare where the plastic melted, suggesting to me a too hot build surface.  This was most evident in the drive gear for the extruder. The result is that unless you remove the flare, the mesh of the extruder gears is very poor.

The extruder body itself was also undersized.  Thus you could not easily place the hot end into the hole without first reaming it out. In the large extruder gear, the head of the hobbed bolt could not be fit into the opening. I was able to use the bed mounts and the Z-axis motor to screw adapters, but I reprinted on other equipment all of the other plastic parts.  Comparing the sizes didn’t need calipers, as it was readily evident to visual inspection.

The heated bed didn’t come with a glass cover (which was expected) but there were no clips to hold down the sandwich of glass and platform as shown in the web catalog shot. In my case, I’m having the glass made with the corners cut at 45 degree angles away from the mounting screws so that the cover will allow for a bed leveling design I’m adding.  Although  it is mentioned that you can cover the heated platform with painters tape or Kapton tape, the glass surface has the advantage in being very flat and uniform.  A local shop made mine for $8.

Conclusions?

For now, I’m waiting to get the glass for the heated build platform, and complete the assembly and confirm my electronics hookup.  Of course, you will end up with a PC power supply on the loose, but that is the nature of this unit.  Is it worth $699 at the store?  Well, stay tuned, as a review of a Solidoodle 2 is coming next week or so.  Although it has a smaller build envelope (6″ cube) it comes fully assembled and tested.

These days the numerous offerings of 3D printers for home use is very reminiscent of the early days of personal computers when models were showing up everywhere — VIC20 anyone?

UPDATE:  I’ve given it the “smoke test” and after powering up, it connected to pronterface and all axes work and the hot end works correctly!  Still waiting for that custom glass piece for the bed!  ;-(  Build video coming soon!

UPDATE #2: Glass piece came but now a big problem – the heated bed is defective!  Somehow it is a dead short, and every time I turn it on from pronterface the next thing to happen is the power supply goes down from overload.  I have a very sensitive ohmmeter and it says “dead short.”  So, thankfully I had another 8×8 mendel prusa heat bed in the shop.  I used this instead for the one that came with the kit and all is well!  I contacted printrbot by email asking for a replacement but no response so far… The next thing is to actually try a print!

UPDATE #3: Someone from printrbot finally responded to my inquiry and at their request, I sent the heated bed plate back to them for testing on July 19.  Well, two weeks later (8/4) still nothing heard… I did just send an email asking for an update on my board.  Compared to Makerbot (where I find the response is almost immediate), the customer service here so far leaves something to be desired….

UPDATE #4: After some fun with the glass company and a replacement heated bed, the unit is done!  But due to my work obligations, vacations and such, I’ve shelved this project because my 3D Systems Cube(tm) is now on the way.  So, maybe I’ll get the time to actually fire this up again and test a real part on it.  I’ll get a report out then!

Printerbot LC+ On the Way

15 Friday Jun 2012

Posted by Eric Albert in Uncategorized

≈ Leave a comment

Printrbot LC

After a long wait (the Kickstarter project funded last December), I received a note from the shipping agent that my LC+ was on the way.  So, sometime next week it should appear at my door and as I have done before, I’ll be posting assembly shots and commentary on the kit.

MakerBot Replicator(tm) first impressions

03 Thursday May 2012

Posted by Eric Albert in Uncategorized

≈ 3 Comments

I received one of the first batches of machines sent out into the wild, being delivered in late March.  I’ve run quite a number of jobs with it and am generally very pleased with this new model.  I have the dual extruder version. Here is some early experience feedback from my one month of use.

First, the machine came incredibly well packed, with custom cardboard inserts and clever use of materials to cushion the bot.  No damage was found from shipping.  Setting it up was pretty simple, although I found the leveling of the build plate to be fussy (more on that below).  My first test print from the SD card went fine.  As I already had a supply of several color ABS spools, I opted for the “standard” order which comes with two spools of ABS: natural and black.

The good:  it works!  Part build quality is very nice and compares favorably to a uPrint ™ machine from Dimension that costs $15,000 that I have in my lab at work.  In fact, it would be very hard for someone to tell the difference, with the notable exception that the uPrint machine only will accept natural ABS and they do not sell tinted material for it (for that you have to purchase the next model up at $19,000).  MakerBot ABS works out to about 65 cents per cubic inch while the “professional” materials for the uPrint ™ are $4.66 a cubic inch.

The bad:  well, a few annoying bugs cropped up the first month.  Getting a part to stick to the build surface can be a real problem.  I’ve followed the cleaning and leveling instructions and still have had issues with builds that have long dimensions on the platform.  Raising the build plate temperature to 105C helped.  And the 4 screws used to level the build plate are just barely long enough to do the job and retain some tension on the springs that are meant to keep things tight. One of the thumbscrews fell off during a build from vibration.  I also hear that they have increased the thickness of the aluminum build plate in models shipping now -mine is slightly warped so that the edges bow up from the center which is the lowest point.

The x-axis limit switch is not mechanically fixed to the PCB it is soldered to, so with time it became angled up off the board and didn’t trip at the end of travel when homing the x axis.  A spot of glue puts it in place permanently.

I also ran into a bug when switching from dual to single extrusion.  Moving from a just finished dual extrusion job to a single extruder, the head not being used is still pretty hot.  This seems to fool the software and so the machine actually times out with a head error and shuts down after a bit thinking that the unused extruder should not be hot.  The solution I found was to let the machine cool down completely and then start the single extruder job.  But this certainly slows things down if you are looking to build a number of parts in sequence.

And, a bug in early hardware (mine included) is that you can’t load or remove an SD card when powered up or bad things can happen.  I don’t know what the exact hardware problem is. So far I’ve not encountered it, but do plan on powering it off before exchanging SD cards.

Also, just a small gripe – at this price, you’d think they could provide the machine with a coat of polyurethane on the plywood, but none of the wood surfaces are protected.

Even so, all in all this is light years ahead of the CupCakeCNC machine they started with (and my model still makes parts!) and higher quality than the ThingOMatic.  Now if they would offer a good 3D scanner!

Newer posts →

Help me keep going in 2023!

Donate Button

Recent Posts

  • And don’t forget the tiny picosatellites!
  • Don’t burst my balloon!
  • New Formlabs referral link
  • Glowforge Discount Code -refreshed for 2023!
  • A brief diversion into an amateur radio mode

Archives

  • March 2023
  • February 2023
  • June 2022
  • February 2022
  • January 2022
  • June 2021
  • May 2020
  • January 2020
  • January 2019
  • July 2017
  • April 2017
  • January 2017
  • October 2016
  • March 2016
  • December 2015
  • October 2015
  • September 2015
  • April 2015
  • January 2015
  • December 2014
  • November 2014
  • October 2014
  • September 2014
  • June 2014
  • April 2014
  • March 2014
  • September 2013
  • June 2013
  • February 2013
  • September 2012
  • July 2012
  • June 2012
  • May 2012
  • March 2012
  • December 2011
  • November 2011

Categories

  • Adventures with a Solidoodle
  • Building the Sumpod
  • General Technology
  • Personal 3D Printers
  • Uncategorized

Meta

  • Register
  • Log in
  • Entries feed
  • Comments feed
  • WordPress.com

Blog at WordPress.com.

  • Follow Following
    • Renaissance Engineer
    • Already have a WordPress.com account? Log in now.
    • Renaissance Engineer
    • Customize
    • Follow Following
    • Sign up
    • Log in
    • Report this content
    • View site in Reader
    • Manage subscriptions
    • Collapse this bar
 

Loading Comments...
 

You must be logged in to post a comment.